Black powder rockets
There are many ways to make a rocket motor. The black powder rocket described here has been in use for many centuries, ever since black powder was invented by the chinese approximately 1300 years ago. It is still used today since the method is quite simple and requires little tooling. As an example, we will show the construction of a 12mm rocket using standard black powder as propellant. However, the same method can be scaled up or down as required, and several other propellants may be substituted to achieve interesting effects.
Materials
CasingA paper tube is used as a casing. Under no circumstances be tempted to use materials other than paper. It is dangerous and unnecessary. Find, roll or buy thickwalled cardboard tubes, preferably parallel wound. The tubes should be sufficiently strong to allow ramming without wrinkling and to withstand the internal pressure during flight. As an example, let's assume we will be using tubes of 80 mm length, 12 mm inner diameter and 3 mm wall thickness as shown. (We should be stocking some parellel wound tubes soon.) |
Tools
A rammer and a hammer are needed. Non sparking materials, such as aluminum, brass and wood should be used.
Propellant
Simple black powder in the standard ratio (75:15:10) works well to propell the rocket, but is somewhat boring in that it does not produce any interesting effects. Therefore, you may want to add some additional (coarse) charcoal or metal powders (5%...10%) to obtain an interesting spark tail. This may alter the burn rate of the mixture slightly, perhaps requiring you to adjust the dimensions of the nozzle and/or core, which will be described below.
The Nozzle
Black powder rockets require a nozzle. This is a plug in the exhaust end of the rocket, with a small opening. This does a number of things. Firstly, it allows the gasses produced by the black powder to build up more pressure. This increases the exhaust velocity, and therefore thrust. The higher pressure, however, also increases the burn rate of the propellant, producing gas at an increased rate which leads to an even higher pressure...which increases the burn rate, which increases the pressure further, which.... Obviously, this process amplifies itself, destroying the rocket in a 'catastrophic failure' or 'CATO' as it is called among rocket builders, if it were not for the exhaust opening in the nozzle. The dimensions of this opening are critical. Ideally, we would like the opening to be small enough to allow the internal pressure to rise, yet not so small as to allow the pressure to rise to a point that the rocket explodes. The proper dimensions are the result of many factors that are most often not accurately known for our simple rockets and are therefore most easily found by trial and error. For our example rocket, a nozzle opening of 3mm was found to work well. For completeness, it should be mentioned here that a proper nozzle design can also greatly improve the efficiency of a rocket engine. A nozzle can be designed to make the most out of the potential energy stored in the pressurised gas in the 'internal combustion chamber' as it is released into the atmosphere. However, as we are not aiming for the moon, this is of no great concern for our small rockets and an terribly inneficient but easily made flat-ended nozzle will do fine.
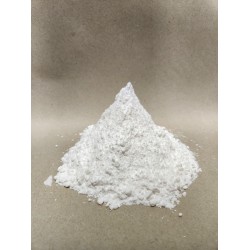
Nozzles for fireworks rockets are usually made with clay. Bentonite and kaolin clay work well. If necessary, a small amount of fine sand may be added to improve the nozzles grip on the casing. The dry clay powder is rammed into the casing, producing a solid plug. Cheap kitty litter is often made of bentonite clay and may be used instead. Grind up the kitty litter into a fine powder, which is most easily done with a ball mill. This powder can be used to produce rock-hard nozzles that erode very little.
Another nozzle material that is quite resistant to erosion is quick-hardening cement. It is wetted with water and pressed into the casing. After a few minutes it has solidified enough to continue with the construction of the motor. Disadvantages are that it is very sticky when wet (making working with it very messy), and the short hardening time which makes it necesarry to work quickly.
'Durhams rock hard water putty' is often mentioned as a nozzle material.
Less resistant to erosion are plaster of paris and polyester. These are all but ideal but they may be used for low temperature propellants, such as the 'five cent sugar rocket' propellant mentioned earlier.
Construction
|
|
Temporarily seal one end of the casing with a bit of paper tape. |
| Dump a small amount of clay into the casing and tap it to settle the powder. Use no more than will give a thickness of approximately the casings inner diameter (12 mm in the example) after ramming to prevent wrinkling of the casing. I judge the amount of clay required by eye, but consistency could be improved by using a scoop that will give you the same amount of powder for every nozzle. |
|
|
|
Continue ramming using black powder, in small increments (as always, no more at a time than will give a layer -after ramming- as thick as the casings inner diameter). As with the nozzle, using a powder scoop for adding the black powder can help producing consistent results at this point. Finally, ram a layer of clay again to form an end plug. The endplug of the rocket in the example is about 10mm thick, slighty less than the casings inner diameter. As seen in the photograph, I leave one or two millimeters of casing unfilled. This will hold the priming for the effect charge, as will be explained shortly. |
| Drill a small hole (2mm in the example) into the end plug and slightly (just barely) into the black powder propellant. At burn-out, when the rocket has consumed all of its propellant, the last bits of propellant will ignite the effect charge through this hole. The high pressure inside the casing will push hot gas and sparks through this hole at exactly the right moment. The hole is best made near the side of the casing as shown -not in the center- since the flame front propagating through the propellant grain will reach this point last. |
|
|
|
Remove the paper tape from the other end of the rocket and proceed to drill the hole in the nozzle. In the example, a 3 mm hole was drilled. Take care to center the hole well. To increase the surface area of black powder available initially, a 'core' is drilled into the propellant as well. The proper depth has to be found by trial and error. Too deep, and the rocket will explode on the launch pad, too shallow and take-off will be very slow which will not allow the rocket to reach a proper altitude (having burnt most of its propellant even before it gains sufficient thrust to take off). In the example, the hole was drilled 20 mm into the propellant grain. |
Payload
|
|
As said, these rockets can carry a small payload into the air. In the example, a small cylindrical shell has been attached to the rocket. The fire transfer hole in the endplug is primed with a bit of loose black powder, and the shell is attached to the casing with tape. The time fuse of the shell must be adjusted for this purpose. Normally, the fuse of shells is long enough to allow the shell to reach maximum altitude when shot from a mortar. When used as a heading for a rocket as shown here, we would like the shell to explode virtually immediately when ignited since the rocket itself already provides the delay. Therefore, a very short length of timefuse should be used in this case. For the example, I used 5 mm of visco, giving a delay of less than half a second. The shell shown weighs about 30 grams, which is approximately the maximum weight the example rocket is capable of lifting to a proper altitude. |
Stick and fuse
|
|
All that remains is a fuse to light and a stick to stabilise the rocket. Use a straight, lightweight stick for this. These are cheaply available from gardening stores where they are sold for supporting plants. A sufficiently long (don't economise on fuse!) length of fuse is inserted into the nozzle and core of the rocket, as far as it goes. To prevent it from falling out, it may be secured with a small piece of tissue paper which is pressed into the nozzle opening. The fuse is bent over as shown and held in place with paper tape. This way of fusing allows you to light the rocket without having to hold a flame directly under the nozzle of the rocket. |




-250x250.jpg)
